


How to Shoot a Bow and Arrow: The Complete Beginner’s Guide (2026)
To shoot a bow and arrow, stand sideways to your target, nock the arrow on the string, then draw the string back to a consistent anchor point on your face using your back muscles. Aim down the arrow or through your sight, release the string smoothly, and hold your form until the arrow lands. Consistency beats strength every time.

Here is the good news before we start: archery is far more about repeatable technique than raw power. If you can copy the same motion over and over, you will hit the target. That is the whole secret. The archers you see splitting arrows at the Olympics are not stronger than you. They have just built a form so consistent that their body does the same thing every single shot.
This guide walks you through everything from your very first piece of safety gear to a three-week practice routine that will get you grouping arrows tightly. We wrote it for people who have never touched a bow, and for people who just unboxed their first one and have no idea what to do next. Both of you are in the right place. If you want to see how the pros frame the basics, USA Archery runs excellent beginner-focused programs that echo a lot of what we cover here.
What You Need Before Your First Shot
You cannot safely or comfortably shoot a bow with just a bow. A few pieces of gear stand between you and a bruised forearm, a pinched string finger, or a bad first impression of the sport. Let us cover what is genuinely required versus what is nice to have.
Safety Gear (Must-Have)
Two items are non-negotiable for your first session. Skip them and you will learn why the hard way.
An arm guard. This is a padded or hard-shell sleeve that straps to the inside of your bow arm, the arm holding the bow. When you release the string, it snaps forward along its path. If your arm is even slightly in the way, and for beginners it almost always is, the string slaps bare skin at high speed. The result is a welt that turns purple and stings for days. Beyond the pain, that string slap flinches you on the next shot, which wrecks your form. An arm guard removes the fear entirely so you can focus on shooting.
Finger protection or a release aid. How you protect your string hand depends on your bow type. For a recurve bow, you need a finger tab, a small leather or synthetic pad that covers the three fingers gripping the string. Without it, the string digs into the soft creases of your fingers and, over a session of thirty or forty shots, tears them up. For a compound bow, most shooters use a mechanical release aid, a trigger device that clips to the string and lets go cleanly when you press a button. We will explain the difference in the next section, but the point stands: your string fingers need protection or a tool, every time.
Optional but smart from day one: safety glasses if you are shooting where anyone else is nearby, and closed-toe shoes. Arrows and dropped equipment do not care about your sandals.
Your Bow and Arrows
You need a bow that fits you and arrows that match it. The two big fit numbers are draw length and draw weight.
Draw length is how far you pull the string back before you shoot, and it is determined by your body, mainly your arm span. Pull too far or not far enough and every shot fights you. A rough at-home method: measure your wingspan from fingertip to fingertip and divide by 2.5. That gives you a starting draw length in inches. For a proper measurement, Archery 360 has a clear walkthrough on finding your draw length that we point beginners to constantly.
Draw weight is how many pounds of force it takes to pull the string to full draw. Beginners consistently pick a weight that is too high because they think power equals accuracy. It does not. A too-heavy bow makes you shake, collapse your form, and develop bad habits fast. Start light. We will give you specific numbers in the FAQ below.
Arrows must match your bow’s draw weight and your draw length. An arrow that is too stiff or too weak, a property called spine, will not fly straight no matter how good your form is. Any pro shop or a decent online spine chart will match arrows to your setup. Do not shoot arrows that are too short for your draw length, ever, because they can fall off the rest and cause serious injury on release.
If you have not bought a bow yet, spend time on the decision. Our compound bow beginner guide and our recurve bow guide for beginners break down what to look for in each. And you will want something to shoot at, so read up on choosing your first archery target before your first session. A bag target or a foam block is plenty to start.
Recurve vs. Compound: Why It Matters for Your Technique
Most beginner guides skip this, and it causes real confusion. The two most common bow types shoot differently enough that the same instructions do not apply to both. Before you learn the steps, you need to know which machine you are holding.
A recurve bow is the simple, elegant one. It is a curved limb design with a single string, no pulleys, no gadgets required. The draw weight increases steadily the further you pull. You hold that full weight at anchor while you aim, using your fingers or a tab on the string. This is the bow used in the Olympics and the one most classes hand you first.
A compound bow uses a system of cams, the wheels at the tips of the limbs, to make the draw easier at full pull. This is called let-off. You might pull 40 pounds to get the string moving, but at full draw the cams take over and you only hold 8 or 10 pounds. That means you can hold longer and steadier while aiming. Compounds almost always use a mechanical release aid and a sight, which makes them more forgiving for a new shooter chasing accuracy.
| Feature | Recurve | Compound |
|---|---|---|
| String draw method | Fingers with a finger tab; you feel full weight at anchor | Mechanical release aid; cams reduce held weight (let-off) |
| Aiming system | Often barebow or a simple sight pin; more feel-based | Pin sight, often with a peep sight in the string; more precise |
| Release method | Fingers relax off the string | Trigger or thumb button on the release aid |
| Skill curve | Harder to master, teaches pure form | Easier to shoot accurately fast, more to maintain |
| Good for… | Classic technique, target archery, learning fundamentals | Hunting, accuracy-focused target work, quick beginner wins |
Neither is better. They are different tools. The steps below cover both, and where the technique splits, we call it out clearly. If you are still deciding, taking a few archery classes near you lets you shoot both before you buy, which is honestly the smartest move a new archer can make.
How to Shoot a Bow and Arrow in 8 Steps
This is the core of it. Read through all eight steps first, then work them one at a time at the range. Do not rush to accuracy. Build the motion, and accuracy shows up on its own.
Step 1 – Find Your Dominant Eye
Your dominant eye is the one your brain trusts for aiming, and it decides which hand should hold the bow. This matters more than which hand you write with. A right-eye-dominant person shoots a right-handed bow, holding the bow in the left hand and drawing with the right.
To find yours, extend both arms and form a small triangle with your hands. Look through that triangle at a distant object with both eyes open, centering the object in the gap. Now close your left eye. If the object stays centered, you are right-eye dominant. If it jumps out of the triangle, close your right eye instead and check the other way. Whichever eye keeps the object centered is your dominant eye. Buy your bow to match it.
Step 2 – Set Your Stance
Stand perpendicular to the target, feet shoulder-width apart, so a line drawn across your toes would point at the bullseye. Weight balanced evenly, knees soft, not locked. This is the square stance, and it is the easiest to repeat.
Your body is the foundation of every shot. If your feet move between shots, your aim moves too. Pick a foot position and use tape or a mat line to hit it the same way each time. Turn your head to face the target while keeping your body square. Stand tall through the spine. Slouching kills consistency.
Step 3 – Grip the Bow (Relaxed, Not Tight)
Here is the counterintuitive one. You do not grip the bow. You let it rest against the meaty pad at the base of your thumb, with your fingers loose or lightly draped. A relaxed hand lets the bow sit in the same spot every shot and jump forward naturally on release.
The instinct to clench is strong because you are holding a weapon and it feels like it should be gripped hard. Fight that instinct. A tight grip twists the bow left or right at the exact moment the arrow leaves, sending shots sideways. Some archers use a wrist sling, a small strap, so they can keep the hand fully relaxed without fear of dropping the bow. We suggest trying one early.
Step 4 – Nock the Arrow
Snap the arrow onto the string at the nocking point, the marked spot on the string where the arrow sits. The arrow’s nock, the slotted plastic end, clicks onto the string. Rest the arrow shaft on the arrow rest or shelf.
Arrows have one differently colored fletching, the feather or vane, called the index or cock feather. On a recurve, that odd-colored fletch usually points away from the bow so it does not smack the rest on the way out. On most compounds with a drop-away or blade rest, orientation matters less, but check your setup. A misnocked arrow flies badly, so make this a deliberate habit, not an afterthought.
Step 5 – Draw Using Your Back Muscles (Not Your Arms)
This is the step that separates archers from people flinging arrows. You do not pull the string with your arm. You draw it by squeezing your shoulder blades together, pulling from the big muscles in your upper back. Your drawing arm and hand are just hooks connecting you to the string. The engine is your back.
Raise the bow toward the target, then draw the string back in one smooth motion while your back does the work. You should feel the muscles between and below your shoulder blades engage. If you feel the burn only in your biceps and forearm, you are arm-drawing, and it will fatigue you in minutes and destroy your consistency. Keep your bow arm shoulder down and settled, not hunched up toward your ear.

For a compound, the draw feels different because of let-off. You pull hard through the middle of the draw, then the cams roll over and the weight drops off dramatically at full draw. Ease into that back wall smoothly rather than yanking through it.
Step 6 – Find Your Anchor Point
Your anchor point is a fixed spot on your face where your drawing hand lands at full draw, the same spot every single time. This is your rear sight. Without a consistent anchor, your arrow launches from a slightly different position each shot, and you will spray arrows no matter how well you aim.
For a recurve shooter, a common anchor is the tip of the index finger touching the corner of your mouth, sometimes with the string lightly touching the tip of your nose and chin. For a compound with a release aid, you might anchor your knuckle behind your jaw and pull your nose to the string or peep. Whatever you choose, it must be repeatable and comfortable. Lock it in and hit it identically on every draw. This one habit fixes more accuracy problems than anything else.
Step 7 – Aim
How you aim depends on your setup. With a sight, line up the sight pin on the bullseye. If your compound has a peep sight, the small ring in the string, look through the peep and center the front sight pin inside it, then put the pin on target. With a barebow or instinctive recurve, you either aim down the arrow tip or train your brain to point where you look, which takes more practice.
Keep both eyes open if you can, and do not fixate so hard that you freeze up. Let the pin float gently on the target. A little wobble is normal and human. Trying to hold dead still actually creates more shake. Settle, aim, and prepare to release without forcing the moment.
Step 8 – Release and Follow Through
For a recurve, the release is a relaxation, not a flick. You simply let the string slip off your fingers by relaxing them while your back keeps pulling. The hand moves backward slightly along your face from the continued back tension. For a compound, you activate the release aid with steady pressure so it surprises you a touch, rather than punching the trigger.
Then comes the part beginners always skip: follow through. Hold your form after the shot. Keep your bow arm pointed at the target and your drawing hand back until the arrow lands. If you drop your bow arm or collapse the instant you release, you are moving the bow while the arrow is still on the string, and you will pull shots low. Freeze like a statue for a full second after every release. Archery 360 covers this and other fundamentals in their rundown of beginner archery tips worth bookmarking.
5 Common Beginner Mistakes (and How to Fix Them)
Everyone makes these. Knowing them in advance means you can catch yourself before they become baked-in habits. Habits are far harder to fix than they are to prevent.

Mistake 1 – Death-Gripping the Bow
The problem: squeezing the bow handle hard out of instinct or nerves. That grip torque twists the bow at release and throws shots left or right, and it is maddeningly inconsistent because you never clench exactly the same way twice.
The fix: relax the bow hand completely, let the bow rest on the thumb pad, and use a wrist sling so you are not afraid of dropping it. Consciously wiggle your fingers loose before each draw until relaxation becomes automatic.
Mistake 2 – Plucking the String
The problem: yanking your fingers or release hand sideways away from your face on release instead of letting the string go cleanly. Plucking sends the arrow left or right and adds a nasty wobble in flight.
The fix: think of the release as your fingers relaxing while your back tension continues pulling, so the hand travels straight back along your neck, not out to the side. Record a slow-motion video of yourself. Plucking is obvious on camera and nearly invisible in the moment.
Mistake 3 – Inconsistent Anchor Point
The problem: your drawing hand lands in a slightly different spot each shot, sometimes higher, sometimes lower, sometimes not touching your face at all. Since the anchor is your rear sight, this scatters arrows vertically and destroys any grouping.
The fix: pick one precise, repeatable anchor and use reference contact points, string on the nose, finger in the mouth corner, knuckle behind the jaw. Say them to yourself each shot until your face knows the spot without thinking.
Mistake 4 – Peeking at the Arrow Mid-Shot
The problem: dropping your bow arm or lifting your head right after release to watch the arrow fly. Because the arrow is still leaving the bow when you move, this pulls your shots, usually low.
The fix: force yourself to hold full form and keep your eyes locked on the target, not the arrow, until it actually hits. Trust that you will see the result a half second later. Follow-through is patience, and patience is a skill you can practice.
Mistake 5 – Drawing with Arms Only (Skipping Back Muscles)
The problem: pulling the string with your biceps and forearm instead of your back. It burns out your arm fast, causes shaking at full draw, and makes a smooth release almost impossible because your arm is straining the whole time.
The fix: consciously initiate the draw by squeezing your shoulder blades together and think of your drawing hand as a passive hook. If you feel the effort in your back rather than your arm, you are doing it right. This is worth drilling with no arrow at low draw weight until it clicks.
Your First Practice Session: What to Expect
Let us set realistic expectations so you do not walk away discouraged. Start close, around 10 to 15 yards, which feels almost too easy for a target that size but is exactly right. Shooting close lets you feel your form without the pressure of distance exposing every tiny flaw. You are here to groove the motion, not win a medal.
Your first arrows will scatter. That is completely normal, and anyone who tells you their first session was tight groups is misremembering. Expect a spread the size of a dinner plate or larger at first, and celebrate when a few land near each other. That clustering, not the bullseye, is the real sign of progress, because a tight group anywhere means your form is repeating. You can adjust where the group lands later.
Your arm and back will get tired faster than you expect, which is why a light draw weight matters so much on day one. When your muscles fatigue, your form collapses, and you start reinforcing bad habits. Stop when you get tired. A focused twenty-shot session beats a sloppy hundred-shot grind every time.
And if you forgot your arm guard, you will find out within the first few shots. That first string slap leaves a red welt on the inside of your forearm that blooms into a bruise by evening. It stings, and worse, it teaches your body to flinch away from the string, which is a habit that takes weeks to unlearn. Wear the arm guard. Every session. No exceptions.
What should you actually work on? Just the fundamentals: consistent stance, relaxed grip, back tension on the draw, and hitting the same anchor point every shot. Ignore accuracy entirely for the first session or two. Film yourself if you can. Nail the motion, and the bullseye comes to you.
A 3-Week Beginner Practice Routine
Here is a structured plan to take you from complete beginner to a confident, consistent shooter over three weeks. Adjust distances to your setup and comfort, and never sacrifice form to chase a longer distance early.
| Week | Distance | Sessions/Week | Focus Area | Goal |
|---|---|---|---|---|
| Week 1 | 10 yards | 3 sessions | Stance, relaxed grip, back-muscle draw, consistent anchor | Repeat the same motion every shot; ignore accuracy |
| Week 2 | 15 yards | 3 to 4 sessions | Follow-through, clean release, fixing your top mistake | Group arrows within a paper-plate size cluster |
| Week 3 | 18 to 20 yards | 4 sessions | Sight adjustment, aiming refinement, tightening groups | Consistent groups near the center at 18 yards |
Keep each session short and focused, roughly 30 to 40 shots with rest between ends, the groups of arrows you shoot before walking down to collect them. Quality reps beat volume. If your form starts to fall apart from fatigue, stop for the day. You will progress faster training clean and tired-free than grinding through sloppy shots.
Frequently Asked Questions
How far should a beginner stand from the target?
Start at 10 to 15 yards. This close distance keeps the target easy to hit so you can focus entirely on building consistent form rather than chasing accuracy. Distance exposes every flaw in your technique, so there is no benefit to backing up early. Only extend your distance once you are grouping arrows reliably at the shorter range, usually after a week or two of regular practice.
Do I need a release aid to shoot a compound bow?
Not strictly, but almost everyone does, and we suggest you use one. A mechanical release aid clips to the string and lets go cleanly with a trigger, which produces a far more consistent shot than fingers can on a compound’s short, steep string angle. You can shoot a compound with fingers or a tab, but it is harder on your hands and less accurate. For target and hunting, a release aid is the standard for good reason.
What arm guard do I need?
Any basic arm guard that covers the inside of your bow forearm will do to start. Look for one that straps securely and does not slide, since a shifting guard can catch the string itself. Beginners often benefit from a longer guard that protects further up toward the elbow, because early form tends to leave the arm in the string’s path. A simple padded or hard-shell guard for under twenty dollars is plenty for your first year.
How long does it take to get accurate at archery?
Most beginners shoot tight, consistent groups at close range within three to four weeks of regular practice, three or four sessions a week. Basic accuracy comes quickly because archery rewards consistency over talent. Refined accuracy at longer distances takes months, and mastery takes years, but the satisfying part, watching your arrows cluster together, arrives fast. Stick with the fundamentals and you will surprise yourself early.
Can I shoot a bow in my backyard?
Sometimes, but check first. Many cities and counties have ordinances that restrict or ban discharging a bow within limits, and these vary widely by location. Even where it is legal, you need a safe backstop, plenty of clear space behind the target, and no chance of an arrow reaching a neighbor’s property. If you have any doubt about your space or local law, shoot at a range or club instead. Safety and legality come before convenience.
What draw weight should a beginner start with?
Start lighter than you think you need. For adult men, 20 to 30 pounds is a sensible starting range; for adult women, 15 to 25 pounds; for youth, 10 to 20 pounds. A weight you can draw and hold comfortably without shaking lets you build proper form, which is the entire foundation of the sport. You can move up in weight later once your muscles and technique develop. Starting too heavy is the fastest way to develop bad habits.
Is recurve or compound easier for beginners?
A compound bow is generally easier to shoot accurately quickly, thanks to its let-off, sight, and release aid, which make each shot more forgiving. A recurve is simpler mechanically but harder to master, since it demands cleaner form and offers no let-off help. If your goal is fast accuracy or hunting, lean compound. If you want to learn pure fundamentals or pursue Olympic-style target archery, start recurve. Either way, trying both in a class before buying is the smartest first step.
RELATED POSTS
View all

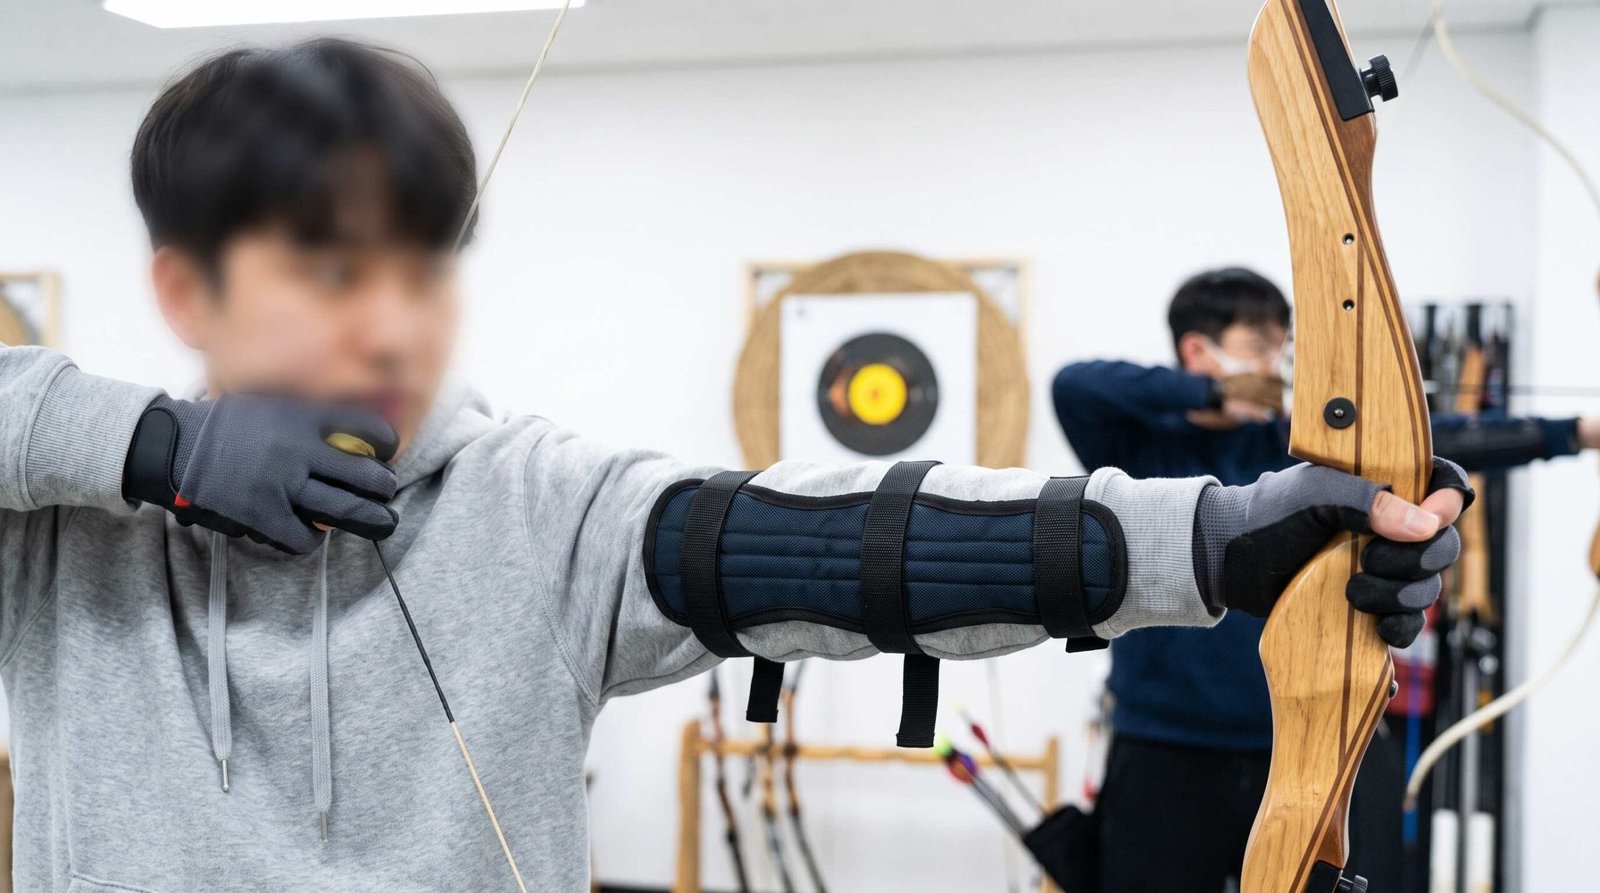
 Photo by KAL VISUALS on Unsplash
 Resources for Finding Quality Archery Equipment, Tools for Learning Archery, and How to Improve
December 22, 2023 | by buyarcheryequipment.com
Archery Lessons: A Beginner’s Complete Guide to Getting Started in 2026
December 22, 2023 | by buyarcheryequipment.com